図形の表示には、Canvasウイジェットを使用します。
create_line()
create_oval()
create_arc()
create_rectangle()
create_polygon()
create_image()
create_bitmap()
create_text()
create_window()
type(id)
bbox(id, ...)
coords(id, x0, y0, ...)
delete(id, ...)
move(id, dx, dt)
tag_lower(id1, id2)
tag_raise(id1, id2)
tag_bind(id, eventsequence, callback)
主なイベントの種類は、以下の通りです。
ButtonPress (Button)
ButtonRelease
Motion
KeyPress, Key
KeyRelease
主なイベントの修飾子の種類は、以下の通りです。
Control
Shift
Lock
Alt
Button1 (B1)
Button2 (B2)
Button3 (B3)
Double
#!/usr/bin/env python
import Tkinter
root = Tkinter.Tk()
c = Tkinter.Canvas(root, width = 200, height = 200)
c.pack()

root.mainloop()
c = Tkinter.Canvas(root, width = 200, height = 200)
#!/usr/bin/env python
import Tkinter
root = Tkinter.Tk()
c = Tkinter.Canvas(root, width = 200, height = 200)
c.create_oval(20, 20, 150, 150)
c.pack()

root.mainloop()
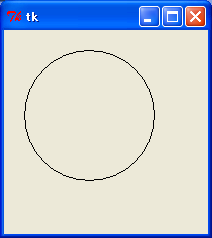
c.create_oval(20, 20, 150, 150)
#!/usr/bin/env python
import Tkinter
root = Tkinter.Tk()
c = Tkinter.Canvas(root, width = 200, height = 200)
c.create_oval(20, 20, 150, 150, fill = '#ff0000')
c.pack()

root.mainloop()
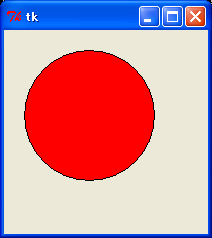
c.create_oval(20, 20, 150, 150, fill = '#ff0000')
stipple = ビットマップ
outline = 色
width = 幅
#!/usr/bin/env python
import Tkinter
root = Tkinter.Tk()
c = Tkinter.Canvas(root, width = 200, height = 200)
c.create_rectangle(20, 20, 150, 150)
c.pack()

root.mainloop()
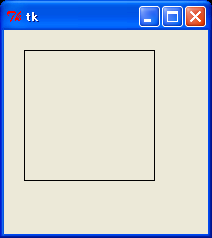
c.create_rectangle(20, 20, 150, 150)
#!/usr/bin/env python
import Tkinter
root = Tkinter.Tk()
c = Tkinter.Canvas(root, width = 600, height = 200)
c.create_line(20, 20, 150, 50, 30, 150, 180, 180)
c.create_line(220, 20, 350, 50, 250, 150, 380, 180, width = 2.0, fill = '#00ff00')
c.create_line(420, 20, 550, 50, 450, 150, 580, 180, smooth = True)
c.pack()

root.mainloop()
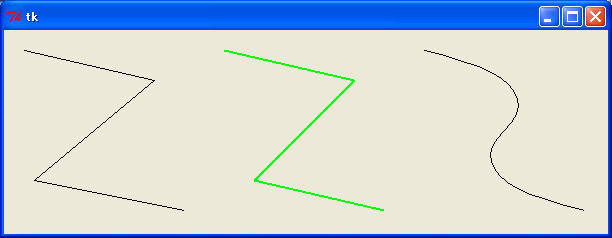
c.create_line(20, 20, 150, 50, 50, 150, 180, 180)
c.create_line(220, 20, 350, 50, 250, 150, 380, 180, width = 2.0, fill = '#00ff00')
c.create_line(420, 20, 550, 50, 450, 150, 580, 180, smooth = True)
#!/usr/bin/env python
import Tkinter
root = Tkinter.Tk()
c = Tkinter.Canvas(root, width = 600, height = 200)
c.create_polygon(85, 20, 150, 80, 120, 150, 50, 150, 20, 80)
c.create_polygon(285, 20, 350, 80, 320, 150, 250, 150, 220, 80, fill = '#0000ff')
c.create_polygon(485, 20, 550, 80, 520, 150, 450, 150, 420, 80, smooth = True)
c.pack()

root.mainloop()
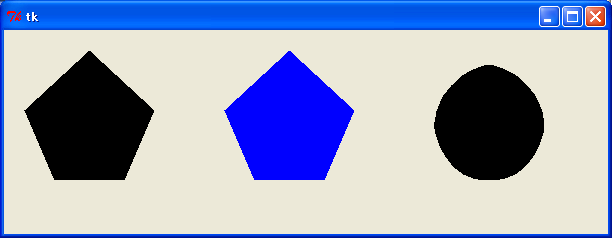
c.create_polygon(85, 20, 150, 80, 120, 150, 50, 150, 20, 80)
c.create_polygon(285, 20, 350, 80, 320, 150, 250, 150, 220, 80, fill = '#0000ff')
c.create_polygon(485, 20, 550, 80, 520, 150, 450, 150, 420, 80, smooth = True)
#!/usr/bin/env python
import Tkinter
root = Tkinter.Tk()
c = Tkinter.Canvas(root, width = 200, height = 200)
c.pack()

im = Tkinter.PhotoImage(file = 'neko.gif')
c.create_image(100, 100, image = im)

root.mainloop()

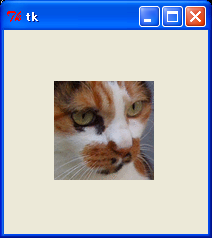
im = PhotoImage(file = 'neko.gif')
c.create_image(100, 100, image = im)
#!/usr/bin/env python
import Tkinter
root = Tkinter.Tk()
c = Tkinter.Canvas(root, width = 200, height = 200)
c.create_text(50, 50, text = 'hello, world!')
c.pack()

root.mainloop()
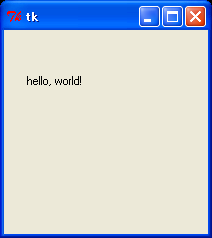
c.create_text(50, 50, text = 'hello, world!')
anchor
font
fill
justify
center
left
right
width
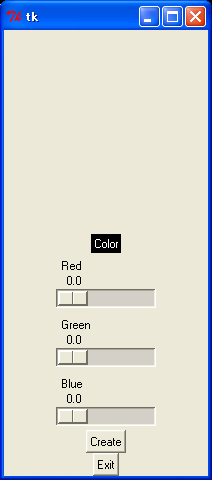
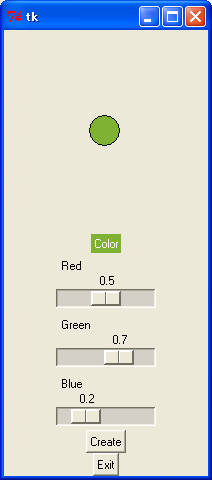
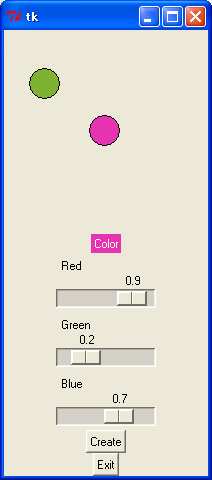
バインディングを使用すると、図形をマウスで移動できるようになります。
#!/usr/bin/env python
import Tkinter
root = Tkinter.Tk()
c = Tkinter.Canvas(root, width = 200, height = 200)
c.pack()
id = c.create_oval(20, 20, 50, 50, fill = '#ff00ff')

def move_oval(event):
	x = event.x
	y = event.y
	c.coords(id, x - 15, y - 15, x + 15, y + 15)

c.tag_bind(id, '<Button1-Motion>', move_oval)

root.mainloop()
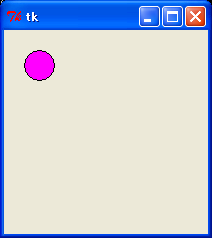
def move_oval(event):
x = event.x
y = event.y
c.coords(id, x - 15, y - 15, x + 15, y + 15)
c.tag_bind(id, '<Button1-Motion>', move_oval)